Choosing a solar mounting system for high-altitude projects requires more than comparing prices or advertised load ratings. At elevation, stronger ultraviolet exposure, freezing temperatures, snow accumulation, and sudden wind changes can challenge every connection. Thin air also affects equipment cooling, while remote locations make repairs slower and more expensive. The best choice must match the site, not merely the product brochure.
Which solar mounting is best for high-altitude areas? The answer depends on roof structure, terrain, snowfall, wind pressure, panel angle, and access conditions. Through practical site inspections, engineers often begin by checking anchor strength, drainage paths, metal thickness, and the available installation space. A steep tilt may improve snow shedding, but it can increase wind uplift. A low-profile design may reduce exposure, yet it could hold snow longer. Small decisions matter.
Materials deserve close attention. Aluminum and coated steel can perform well, but their suitability depends on corrosion exposure, fastener compatibility, and installation quality. Freeze-thaw movement may loosen poorly designed joints. It can happen quietly. Regular inspection points should remain accessible, especially when heavy snow blocks the array. Local structural calculations and qualified professional review are essential before installation.
There is no universal winner. A mounting system selected too quickly may fail under conditions that looked manageable on paper. Even experienced teams can overlook drifting snow or difficult maintenance access. This guide compares fixed-tilt, adjustable, roof-mounted, and ground-mounted solutions, helping readers weigh durability, safety, energy yield, and long-term service needs at high elevations.
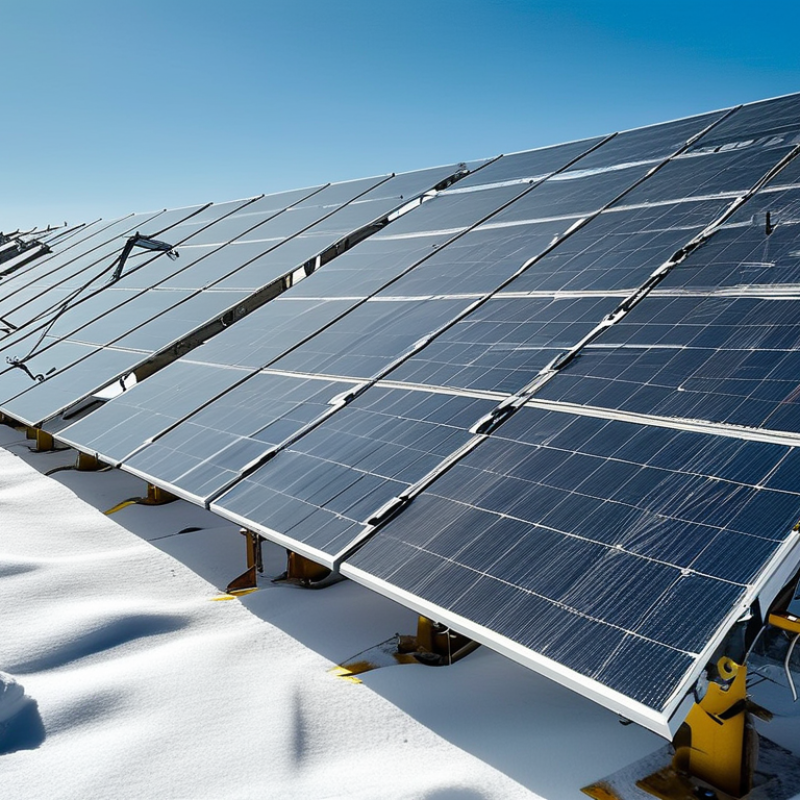
At high elevations, solar mounting begins with climate, not panel size. Thin air does not remove wind risk. It can increase uplift loads where gusts accelerate across exposed ridges. Snow, ice, ultraviolet radiation, and sharp temperature swings also affect the mounting system. A suitable design uses site-specific wind and snow data, verified against current structural codes. Generic load tables are rarely enough. Plans can mislead.
Choose corrosion-resistant aluminum or properly protected steel, with fasteners rated for freeze-thaw cycles. Inspect every connection after transport; rough mountain roads can loosen hardware before installation. The foundation needs equal attention. Rocky soil may require drilled anchors, while fractured ground can demand a revised layout. Keep cable entries sealed, and provide drainage around posts. Water trapped in a small cavity can freeze overnight and split a fitting. Details matter.
Tilt and row spacing should balance winter snow shedding with solar production. Avoid placing lower modules where drifting snow will bury them. Grounding and bonding must remain reliable despite dry soil, lightning exposure, and seasonal movement. A qualified structural engineer should review the calculations and field conditions before approval. In practice, the first design is not always the best one. Not always. Recheck it after a site walk, even when drawings appear complete. Leave clear access for inspection, snow removal, and repairs during severe weather.
How to Choose the Best Solar Mount for High Altitudes?
At high elevations, solar mounting begins with the site, not the panel. Thin air does not reduce risk; strong wind can increase uplift on exposed roofs. Snow loads, freezing temperatures, and ultraviolet exposure also affect structural performance. During a roof inspection, look for cracked membranes, rusted fasteners, and weak rafters. A roof-mounted structure saves ground space, but repairs become harder after installation. Its attachment points must transfer loads into sound framing, not just roofing material.
Ground-mounted structures offer easier access and simpler maintenance. They also allow better panel orientation when the roof faces the wrong direction. However, rocky soil can make excavation expensive, while snow drifts may bury lower modules. A detailed geotechnical check helps determine foundation depth and drainage needs. Concrete can crack during repeated freeze-thaw cycles. That risk deserves more attention than it usually receives.
Pole-mounted systems use less land and can lift panels above deep snow. They may work well on uneven slopes, but their tall profile faces stronger wind forces. Steel poles require careful corrosion protection and precise foundation design. The mounting angle should balance winter production, snow shedding, and maintenance access. I would not choose a pole simply because it looks efficient. A licensed structural professional should verify wind, snow, seismic, and soil conditions. Site drawings are useful, but field measurements can expose uncomfortable assumptions. Sometimes, the cheapest structure is only cheap before the first severe winter.
Evaluating roof-, ground-, and pole-mounted solar structures by their typical clearance above the mounting surface.
How to read the chart: Ground- and pole-mounted systems generally provide more clearance for snow accumulation, inspection, and maintenance. Roof-mounted systems usually require less structural steel but depend heavily on roof strength, snow-load capacity, waterproofing, and wind uplift resistance. Actual dimensions must be verified through a site-specific structural and environmental assessment.
How to Choose the Best Solar Mount for High Altitudes?
High-altitude mounting begins with measured weather data, not a catalog image. ASCE 7-22 requires site-specific wind and snow design values. Thin air does not automatically mean low wind risk. Ridge-top turbulence can increase uplift on exposed arrays. Use corrosion-resistant aluminum or hot-dip galvanized steel, with stainless fasteners where moisture and salt exposure overlap. Avoid hidden dissimilar-metal contact. It can create galvanic corrosion.
Snow deserves careful attention. The International Building Code and ASCE 7-22 distinguish ground snow loads from roof snow effects. Wind-driven drifting can place uneven pressure across a frame. A mount should transfer those loads into verified structural members, not only roof sheeting. Rounded rails reduce snow traps, although this benefit is often overstated. Field inspection still matters.
Temperature movement is quieter but persistent. IEC 61215 qualification includes thermal cycling from -40°C to 85°C, showing how severe repeated expansion can become. The mount and module should allow controlled movement without loosening clamps. At high elevations, stronger ultraviolet exposure also accelerates polymer aging. Select UV-stable gaskets and inspect them annually. I would not call any material “maintenance-free.” That promise usually hides assumptions about access, drainage, and fastener torque. A small torque check after the first winter can reveal installation errors before snow exposes them. These choices should be verified against local engineering calculations, measured roof capacity, and the latest meteorological records from the site.
At high elevations, a solar mount must balance tilt, orientation, snow, and wind. Start with tilt, not appearance. A practical baseline places panels near the site’s latitude, then adjusts for local weather. Steeper angles can help snow slide away and improve winter production. However, an extreme tilt may reduce summer output and increase structural loads. The perfect angle does not exist.
Orientation also changes annual energy performance. In the Northern Hemisphere, panels usually face true south. In the Southern Hemisphere, true north is generally preferred. Magnetic compass readings can be misleading near metal structures, so use a corrected bearing or professional survey. Morning and afternoon shading matters, even when the array looks open. A nearby ridge can hide low winter sunlight.
High-altitude sites often receive strong sunlight, but cold temperatures can also improve panel efficiency. Wind exposure, frozen ground, and heavy snow require careful mount selection and secure anchoring. Leave enough clearance beneath the panels for airflow and snow movement. A performance model should compare several tilt angles, not just one. Include monthly sunlight, shading, snow losses, and temperature effects.
Field measurements may challenge the model, especially after the first winter. My own design preference is to record actual production and revise assumptions instead of trusting a clean spreadsheet. Even a small five-degree adjustment can matter over a long, exposed roof.
At high altitude, a solar mount faces thinner air, stronger UV, snow, ice, and sudden temperature changes. Installation safety must guide the choice, not just the lowest price. A qualified installer should check roof structure, local wind and snow loads, anchor spacing, and safe access before drilling. On a steep roof, temporary walkways and fall protection are essential. Small shortcuts become expensive mistakes.
Choose corrosion-resistant hardware and rails designed for repeated freezing and thawing. Aluminum can be useful, but every connection still needs compatible fasteners and isolation washers. Galvanized steel may perform well when its protective coating remains intact. Inspect cut edges carefully. They often become weak points.
Durability also depends on movement. Thermal expansion can loosen joints if the system lacks suitable allowances. Use calibrated torque tools, then record torque values and installation dates. This creates a dependable maintenance trail. I would schedule an inspection after the first severe winter, even when everything looks fine. Snow can hide shifted clamps. UV exposure can harden seals faster than expected. Maintenance should include checking loose bolts, corrosion, cracked sealants, cable rubbing, and drainage paths. Access may be difficult at elevation, so design service routes before installation. My earlier assumption that “robust” hardware needs little attention was incomplete. Good mounts still need evidence, inspection, and occasional correction.
High elevations bring strong winds, snow, freezing temperatures, and intense ultraviolet exposure. Thin air does not guarantee lower risk. Ridge-top turbulence can increase uplift.
It works when the roof has sound rafters and healthy waterproofing. Inspect for cracked membranes, rusted fasteners, and weak framing. Repairs may become harder later.
Ground systems provide easier access and simpler maintenance. They can also improve orientation when the roof faces poorly. Rocky soil may make excavation expensive.
Snow drifts can bury lower modules and block airflow. Drainage and foundation depth need local soil checks. I might underestimate drifting without a winter site visit.
Pole mounting can lift panels above deep snow and suit uneven slopes. Its tall profile receives stronger wind forces. Efficient-looking designs can still be structurally expensive.
Corrosion-resistant aluminum or galvanized steel can perform well. Use compatible fasteners and prevent hidden metal contact. Galvanic corrosion can begin quietly.
Panels and mounts expand and contract repeatedly. Clamps should allow controlled movement without loosening. Thermal cycling is severe. Inspect gaskets and fastener torque annually.
Begin near the site’s latitude, then compare several angles. Steeper panels may shed snow and improve winter output. Excessive tilt can increase wind loads.
Compare monthly sunlight, shading, snow losses, and temperature effects. Record production after winter. A clean spreadsheet can still be wrong.
A licensed structural professional should verify wind, snow, seismic, soil, and roof conditions. Field measurements may challenge the drawings. That uncomfortable correction is useful.
Choosing the right solar mounting system for high-altitude areas requires careful consideration of harsh environmental conditions. Thin air, strong winds, heavy snow, intense sunlight, and rapid temperature changes can place extra stress on the structure and solar panels. Roof-mounted, ground-mounted, and pole-mounted systems each offer different advantages depending on available space, terrain, accessibility, and foundation requirements. Durable, corrosion-resistant materials and reinforced connections are essential for long-term stability in extreme climates.
Which solar mounting is best for high-altitude areas? The answer depends on the site’s wind and snow loads, roof condition, ground quality, and energy goals. A suitable tilt angle and orientation should maximize solar exposure while reducing snow accumulation and wind resistance. Installers should also evaluate construction safety, drainage, grounding, inspection access, and future maintenance needs. A well-designed system should balance energy performance, structural durability, installation practicality, and reliable operation throughout changing seasonal conditions.

Trope Solar