Solar panels may last for decades, but a poorly sealed roof penetration can fail within one storm. That contrast explains why waterproofing deserves careful planning, not a last-minute bead of caulk. This guide explores 7 Best Ways to Waterproof Roof Penetrations During Solar, from compatible flashing systems to detailed post-installation inspections. It addresses asphalt shingles, metal roofing, tile, and low-slope membranes, because each surface needs a different response.
So, How to waterproof roof penetrations during solar installation? Begin with the roof, not the solar hardware. Check its age, drainage, existing damage, and manufacturer requirements. Thomas W. Hutchinson, PE, a respected solar engineering author, offers a practical warning: “Every roof penetration must be treated as a potential leak path.” That principle sounds simple. It is often ignored.
Reliable work includes properly sized boots, mechanically secure flashing, compatible sealants, and careful fastener placement. Sealant alone is not a waterproofing strategy. Water can travel beneath shingles, around exposed threads, or through a cracked membrane. Small details matter. A lifted shingle edge can become a hidden entry point. A blocked drainage path can create standing water around an attachment.
Even experienced installers can miss something. That deserves honest review. Weather, roof movement, thermal expansion, and aging materials may expose weaknesses years later. Therefore, this introduction focuses on methods that combine installation experience, manufacturer guidance, documented inspections, and realistic maintenance planning. The goal is not merely a dry roof today. It is a roof penetration system that remains defensible, serviceable, and reliable through changing seasons.
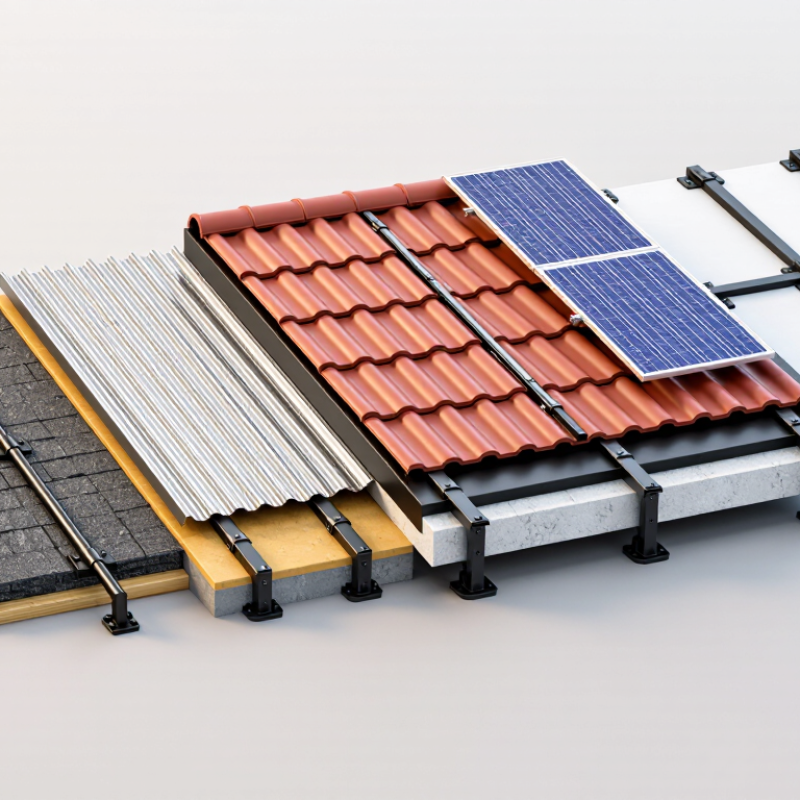
7 Best Ways to Waterproof Roof Penetrations During Solar
Map and Prepare Roof Penetrations Before Solar Installation
A reliable waterproofing plan starts before the first panel reaches the roof. Mark every proposed penetration on a roof plan. Include mounts, conduit entries, vents, skylights, drains, and existing repairs. Measure their distances from ridges, seams, edges, and drainage paths. A simple roof sketch can expose conflicts that drawings often miss.
The International Energy Agency Photovoltaic Power Systems Programme reported more than 1.6 terawatts of global solar capacity by the end of 2023. That scale makes small installation errors increasingly expensive. NREL’s best-practice guidance emphasizes documented inspections, clear access, and consistent operations and maintenance procedures. Treat the roof as a drainage system, not just a mounting surface. Keep new penetrations away from ponding areas and crowded flashing zones. Sometimes, fewer anchors provide better protection.
Before drilling, inspect the membrane, shingles, flashing, and deck condition. Photograph each location. Check whether the roof warranty requires approved details or qualified installers. Use compatible sealants, boots, and metal flashings for the roofing material. Never bury a damaged substrate beneath new hardware. That shortcut may look efficient. It is not.
After installation, record fastener types, torque values, sealant batches, and penetration coordinates. Water testing can help, but it cannot replace visual inspection during rain. NREL also recommends recurring system checks, yet inspection intervals should reflect local weather, roof age, and exposure. My own cautious preference is to review every new penetration twice: immediately, then after the first severe storm. Teams sometimes trust neat-looking sealant too much. Clean workmanship still needs evidence.
A practical planning table for locating, preparing, sealing, and inspecting roof penetrations before solar work begins.
| No. | Waterproofing Method | Best Application | Roof-Mapping and Preparation | Primary Water Barrier | Key Installation Detail | Verification Before Panel Installation | Routine Inspection Focus |
|---|---|---|---|---|---|---|---|
| 1 | Pre-installation roof penetration map | All solar projects, especially roofs with existing vents, skylights, drains, and mechanical equipment. | Mark every existing and planned penetration on a roof plan. Record location, penetration type, roof covering, nearby seams, drainage paths, and the distance to roof edges and obstructions. | A coordinated layout that prevents unnecessary holes and avoids weak roof areas. | Keep new penetrations away from roof seams, valleys, ponding areas, damaged materials, and existing flashing whenever the structural design permits. | Compare the roof plan with the actual roof using photographs and field measurements. Confirm that no attachment conflicts with vents, rafters, electrical equipment, or drainage routes. | Check for unrecorded penetrations, movement, exposed fasteners, blocked drainage, and new cracks around attachment points. |
| 2 | Factory-formed metal flashing | New pipe, conduit, equipment, and structural attachment penetrations through asphalt shingle, metal, or other compatible roof systems. | Remove or lift the roof covering only as much as necessary. Inspect the substrate and confirm that the flashing base can drain water downslope. | A continuous metal flange integrated with the roof covering and sealed at the upper and side edges. | Install the flashing in the correct water-shedding sequence: upper layers overlap lower layers. Use corrosion-resistant fasteners compatible with the roof materials. | Confirm that the flange lies flat, fasteners are properly seated, and no exposed opening remains above or beside the penetration. | Look for lifted edges, corrosion, loose fasteners, cracked sealant, and water stains in the attic or interior ceiling. |
| 3 | Preformed pipe or conduit boot | Round electrical conduit, small plumbing pipes, and cable routes that require a flexible seal around the shaft. | Verify the boot size against the outside diameter of the pipe. Clean the roof surface and remove brittle or damaged surrounding materials. | A flexible elastomeric collar combined with a formed base flange. | Trim the collar only to the marked pipe diameter, keep the collar snug around the pipe, and place the base so water flows over it rather than behind it. | Check for a continuous collar contact, a flat base, properly seated fasteners, and no visible gap between the pipe and boot. | Inspect for splitting caused by ultraviolet exposure, shrinkage, animal damage, loose collars, and cracked or displaced sealant. |
| 4 | Compatible roofing sealant with mechanical fastening | Supplemental sealing around flashing edges, approved fastener heads, small gaps, and transitions between compatible materials. | Dry and clean the bonding area. Confirm that the sealant is approved for the roof membrane or covering and for the expected temperature range. | Mechanical compression from the flashing or fastener, with sealant acting as a secondary water-shedding layer. | Apply a continuous, controlled bead where specified; do not use sealant as the only support for a structural solar attachment or as a substitute for proper flashing. | Check for complete adhesion, consistent coverage, no pinholes, and no contamination from dust, moisture, oil, or incompatible materials. | Look for chalking, shrinkage, cracking, peeling, loss of adhesion, and areas where water can collect against the sealant bead. |
| 5 | Self-adhered flashing or waterproofing membrane | Complex transitions, irregular roof details, and supplemental protection around compatible penetrations and mounting bases. | Prepare a smooth, dry, sound surface. Plan overlaps so the upper membrane layer covers the lower layer and does not create an uphill water dam. | A bonded membrane layer that bridges minor surface irregularities and directs water around the penetration. | Press the membrane firmly into corners and around the penetration. Maintain manufacturer-specified laps, avoid wrinkles, and protect the membrane from puncture during installation. | Confirm full contact, sealed edges, correct overlap direction, and no fishmouths, wrinkles, open corners, or unsealed cuts. | Inspect for edge lifting, punctures, blistering, weathering, and separation from dusty, wet, or incompatible substrates. |
| 6 | Butyl or elastomeric gasket beneath mounting hardware | Solar attachment points and equipment bases designed to use a compressible gasket as part of the flashing system. | Locate the structural support below the roof and confirm the attachment point is not in a roof valley, drainage path, or deteriorated deck area. | A compressed gasket combined with the mounting base, flashing, and properly installed fastener. | Use the gasket dimensions and compression requirements specified for the assembly. Do not substitute loose tape or a random sealant bead for a designed gasket system. | Verify that the base is fully supported, the gasket is not pinched or displaced, and fasteners are installed to the specified depth and torque. | Check for compression loss, exposed gaps, fastener loosening, gasket hardening, corrosion, and movement of the mounting hardware. |
| 7 | Post-installation water-management inspection | Final quality control for every roof penetration before modules, wiring, or access equipment conceal the work area. | Use the penetration map, installation photographs, and roof plan to inspect each location. Confirm that water paths, gutters, drains, and maintenance walkways remain clear. | The complete system: roof covering, flashing, gasket or membrane, fasteners, sealant, and correct drainage sequencing. | Inspect from above and, where accessible, from the attic or interior. Use controlled water testing only when permitted by the roof-system requirements; avoid high-pressure spraying. | Document each penetration with photographs, location references, installer sign-off, visible defects, and corrective actions completed before panel installation. | Reinspect after severe weather and during scheduled roof maintenance. Pay special attention to leaks, ponding, displaced flashings, and cable supports. |
A roof plan shows mounts, conduit entries, vents, skylights, drains, and existing repairs. Measure each point from ridges, seams, edges, and drainage paths. A simple sketch can reveal conflicts hidden in technical drawings.
Keep them away from ponding areas, crowded flashing zones, roof edges, and drainage paths. Water needs a clear route. Sometimes, fewer anchors offer better protection.
Inspect the membrane, shingles, flashing, and roof deck. Photograph every proposed location. Do not cover damaged materials with new hardware. That shortcut fails.
Match sealants, boots, gaskets, and metal flashing to the roofing material. Check the roof warranty for approved installation details. Mixed materials may age differently. This detail is easy to overlook.
Place base flashing beneath the uphill roofing course. Layer the upper roofing courses over it. This creates a shingle-like drainage path. Protect exposed edges with counterflashing or an integrated skirt.
No. Sealant should support the waterproofing detail, not replace it. Use hardware designed for roof penetrations. A clean bead can still hide poor drainage.
Secure fasteners into structural framing, not only roof decking. Keep the gasket flat against a clean surface. Avoid over-tightening, which can deform the gasket and create hidden leaks.
Record fastener types, torque values, sealant batches, and penetration coordinates. Photograph each flashing detail. Keep these records for future inspections and repairs.
Inspect them immediately after installation and again after the first severe storm. Check for lifted flashing, cracked sealant, rust stains, and damp insulation. Rain can reveal what dry weather misses.
An aging roof may need replacement before the solar array is installed. Later replacement could require removing the array. The fastest installation is not always the most durable choice.
How to waterproof roof penetrations during solar installation? Begin by mapping every planned penetration and inspecting the roof surface, structure, and drainage paths before work starts. Select flashing and mounting hardware that match the roof design, then install them with proper alignment, fastening, and overlap so water is directed away from vulnerable joints. Sealants and membrane patches should be compatible with the specific roofing material and applied only to clean, dry surfaces.
Additional protection can include weatherproof boots, protective caps, drip loops, and secondary drainage details that prevent water from collecting around cables and mounts. After installation, test the penetrations for leaks, inspect all seals and transitions, and record the materials, locations, and installation methods used. Regular maintenance should include checking for cracked sealant, loose hardware, blocked drainage, and weather damage. A careful combination of planning, compatible materials, correct installation, testing, and ongoing inspections helps preserve roof performance while supporting a reliable solar system.

 Trope Solar